With the release of Oracle Enterprise Repository 12c another product was released. Oracle API Catalog 12c (OAC) allows you to build a catalog of your organization APIs. OAC provides a layer of visibility to those APIs so application development knows what and which one to use. OAC includes a simple metamodel for an API asset, automation to populate OAC, and the ability for users to search OAC for APIs and understand the details of the APIs to assess their fit in the user’s application.
Installation
I’m not going to bore you with the details about the installation by giving a installation guide. It took me about 40 minutes from scratch (excluding downlOERoad time). The steps are describes in the installation guide Oracle provides. OAC is part of the OER 12c installation jar, but can be licensed and installed, as an own managed domain, without licensing and installing OER.The steps to take on high level (from scratch):
- Download and install Oracle Database, Fusion Middleware Infrastructure 12c, Oracle Enterprise Repository 12c, RCU patch 18791727 and Weblogic patch 18718889 (these last two are important, else you can’t install OAC).
- Run RCU (oracle_common/bin/rcu.sh|bat) and create the OAC repository
- Run Weblogic Domain creation (weblogic/bin/config.sh|bat) and create a new which includes OAC.
- After installation and startup of weblogic and managed service you can find the OAC console at url: http://serverhost:8111/oac
Taking the first steps
When taking my first steps the official getting started guide can help you a lot. OAC has four high-level features. OAC collects services, it has a harvester which creates API assets in OAC. After harvesting you can add metadata to the API assets like description, tags and documentation. After harvesting and editing an API asset it can be published so it is visible for application development. Published APIs can be discovered and used through the API Catalog console and via the Oracle JDeveloper Oracle Enterprise Repository plug-in.Logging in for the first time
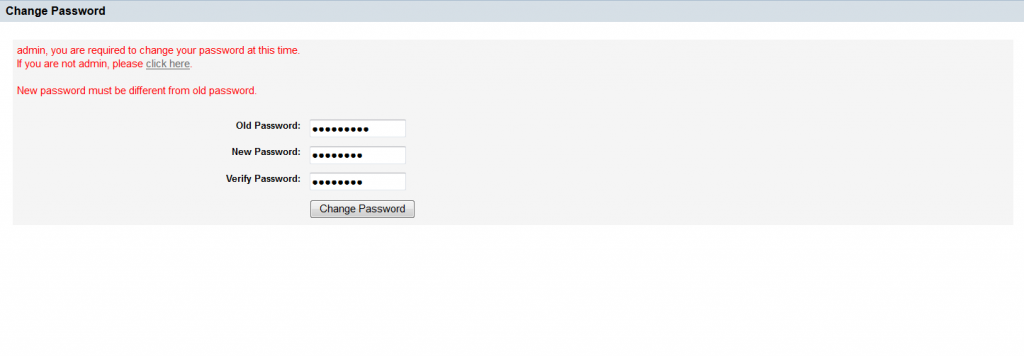
After installing FMW & OAC 12c and starting the Weblogic server you can login into the provided OAC console (default) running at http://serverhost:8111/oac.The default username and password is admin / weblogic1. The first time you are asked to change the password.
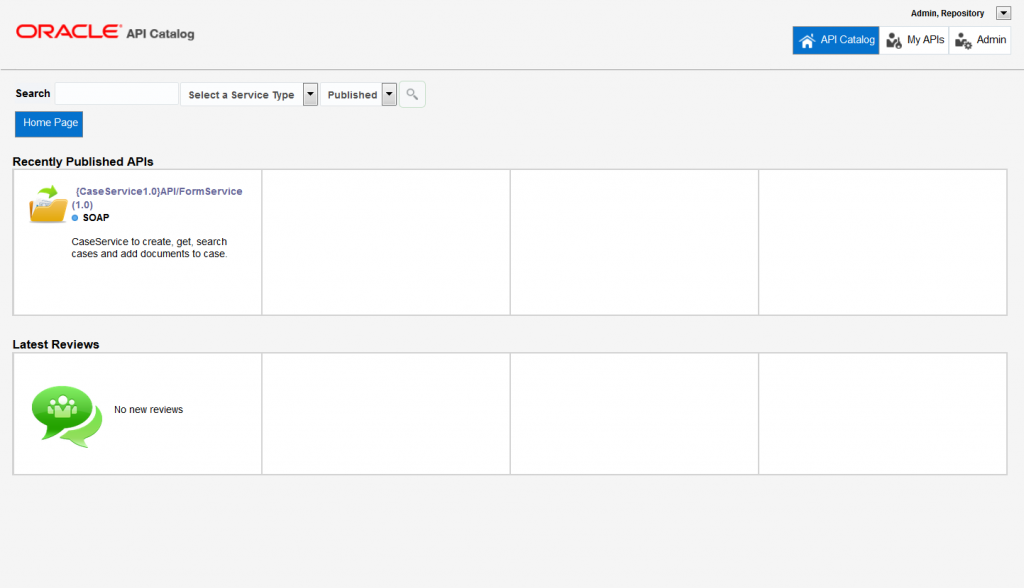
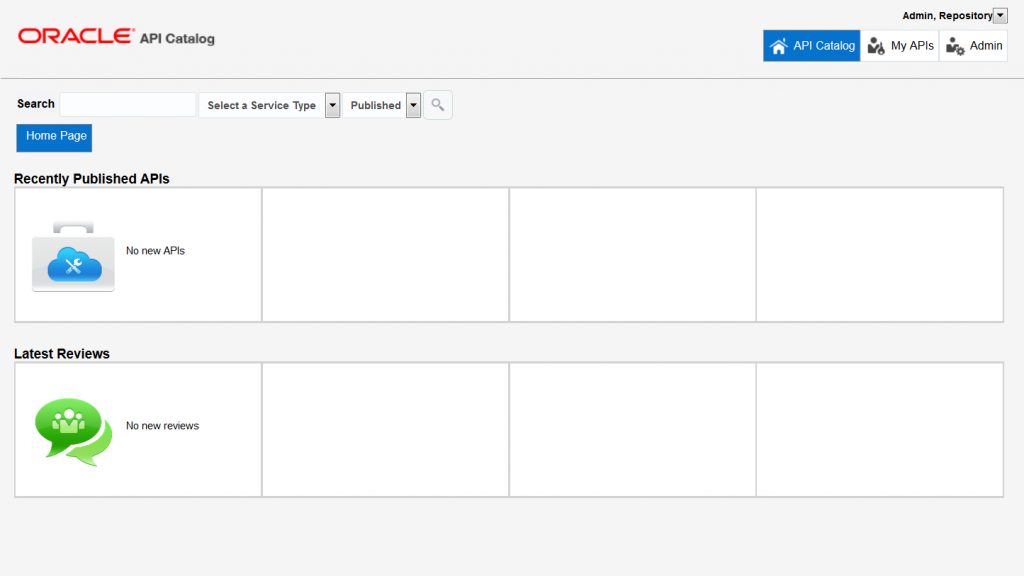
After changing the password you will login into the console. The dashboard will be empty because no APIs are harvested yet. But when APIs are harvested they are listed at this page. On this page you can also navigate to “My APIs” which list the API you bookmarked.
As admin, navigate to “Admin”, you can configure Users and Departments, control Sessions, change System settings and Import/Export the catalog. This blog will go in to the Admin features later on.

Collecting / harvesting services
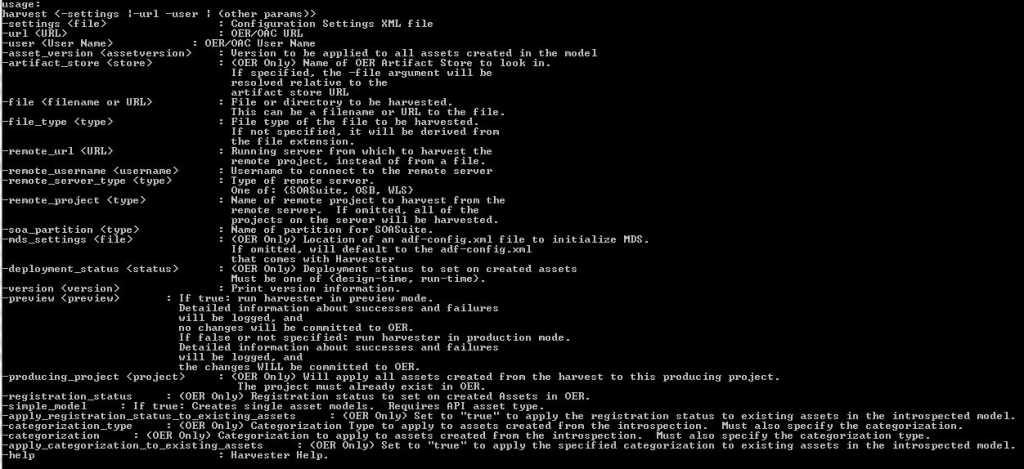
The first activity is to harvest APIs into OAC. The harvester is used to populate OAC with API assets from SOA Suite and Service Bus or other deployed services. The harvesting process can be run from the command line or can be integrated into the build process. The latter can be used to automatically do the harvest at build time. Harvested API assets will get a “Draft” state and won’t be visible to developers yet.For this blog I will use the command line harvester. There are to types of harvesters; one for SOA Suite, OER & File-based assets and one for harvesting OSB. I will use the first harvester and use it with integrated SOA Suite 12c environment.
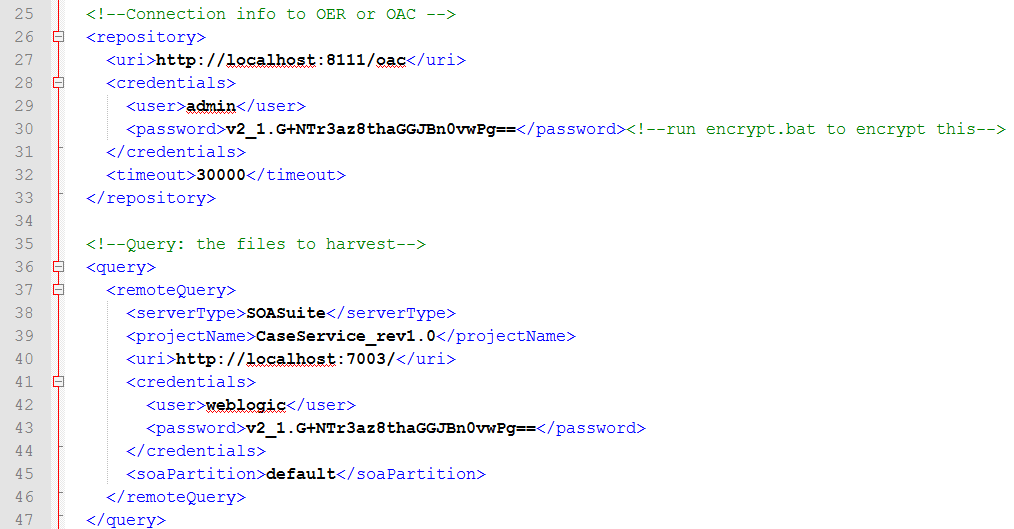
For this blog I changed the HarvesterSettings.xml, which is decribed here, and added OAC en SOA server information, including projects to harvest.
Doing it like this you don’t have to add any parameters to harvest.sh|bat. If you want to harvest a specific asset you can use the command line properties, for example another SOA composite.
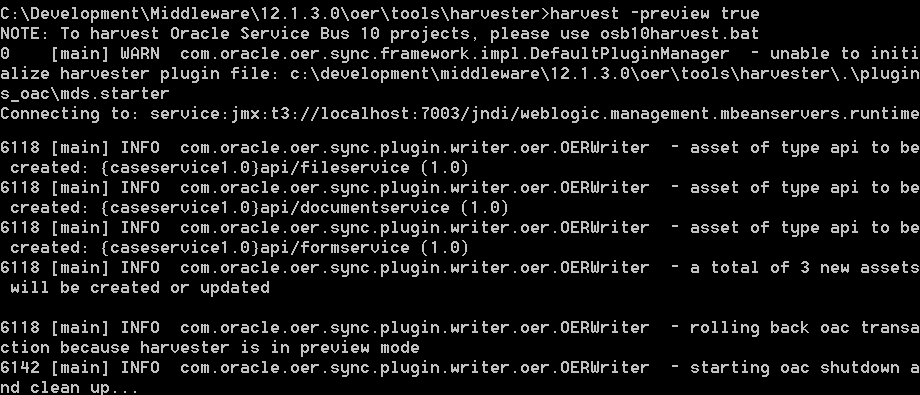
The result after running the harvest command should look something like on the image below (in preview mode).
View harvested APIs
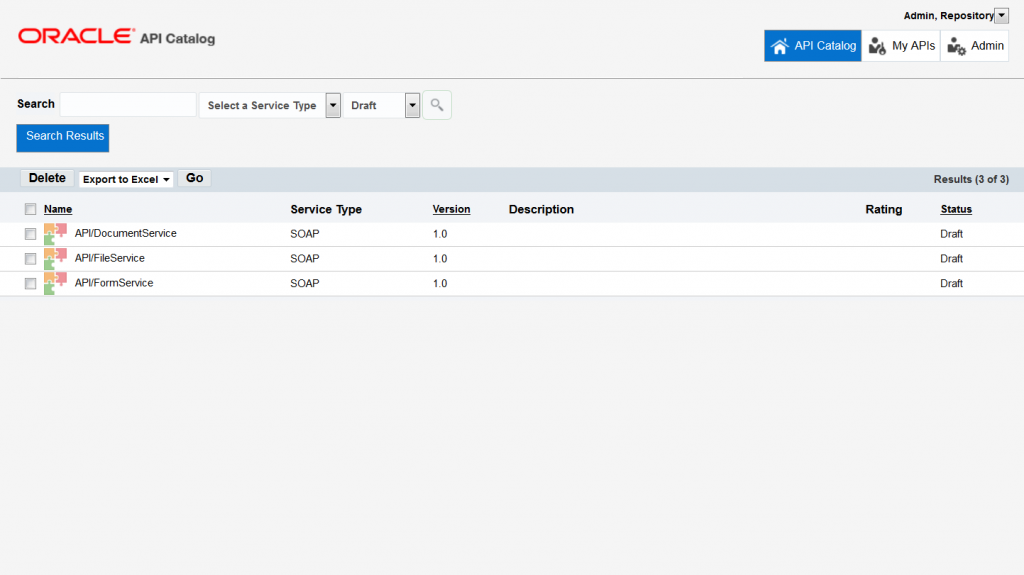
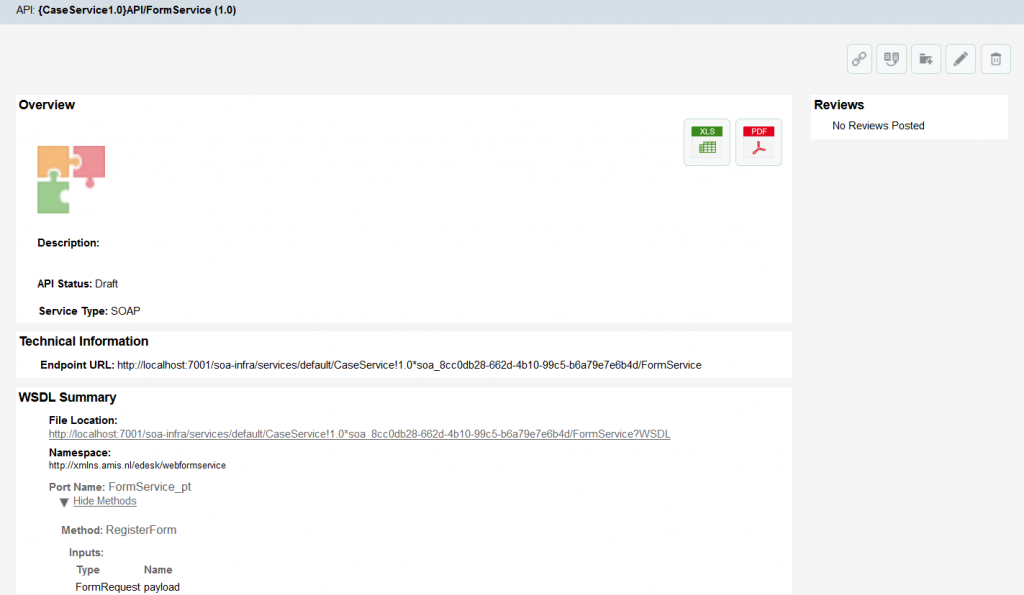
After harvesting you first asset(s) you can login the OAC console to see the result. Assets that are harvested will get the “Draft” status, thats why after logging into the OAC console again, no APIs are published and visible on the dashboard. Search on Service Type = Draft to view newly harvested APIs.To see, edit and publish the API asset details click on the specific row. The details page opens which shows information about the asset like Type of Asset, Endpoint, Harvester properties and WSDL summary including namespace, porttype and methods.
Besides the details you can perform some actions (from left to right):
Link, toggle view, bookmark, edit & delete
- Link to details page: Get URL of API asset details page you currently look at and can share.
Example: http://soabpm:8111/oac/index.jsp?assetid=50003&renderMinMaxButton=false&renderNextPrevButtons=false

- Add to My APIs: Click to bookmark API. After bookmarking API it is visible under MyAPIs page.
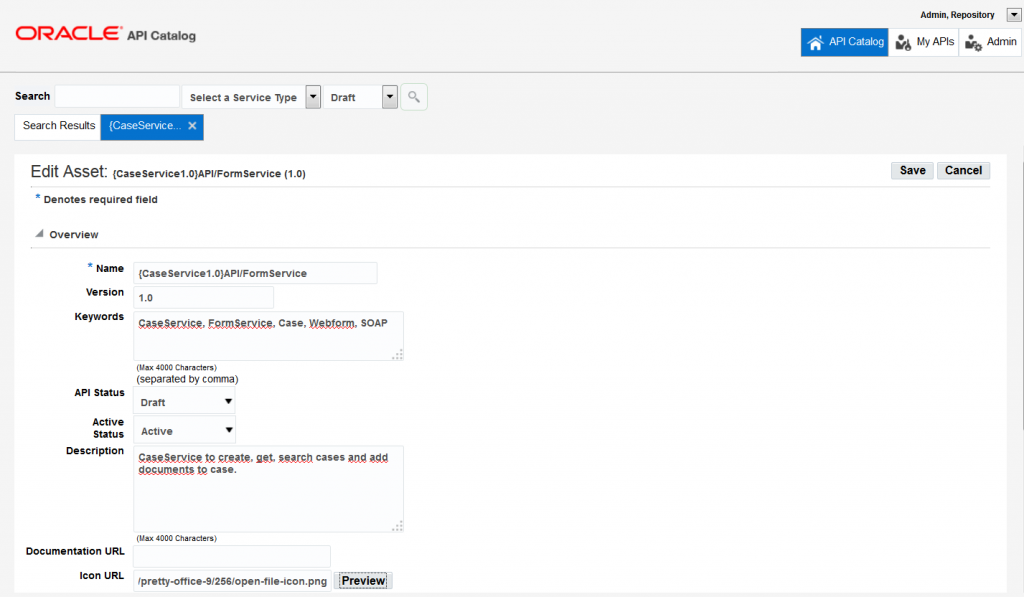
- Edit details: Page to edit API asset details. More about this below.
- Delete items: Delete the API asset from the repository.
Add metadata to harvested API
To add metadata or edit other details of an API asset click on the edit icon/button to open the Edit Asset page. On this page you can change the name, change the version, add keywords and descriptions, but also add a link to documentation URL and assign/upload an icon. To publish an API change the API status from Draft to Published. It is also possible to set the API active status from Active to Retired.Publish a draft API
To publish an API you just need to change the API status to published and saving the asset.On the overview page the API status is changed and the API details can be exported to Excel and PDF.

Sharing the APIs with other users
After taking the first steps the APIs can be shared with other users. To do so new users can be added with specific roles. As admin user click on the “Admin” menu item and choose the Users section (selected by default). From this page new users can be created, you can search for users and edit & delete users.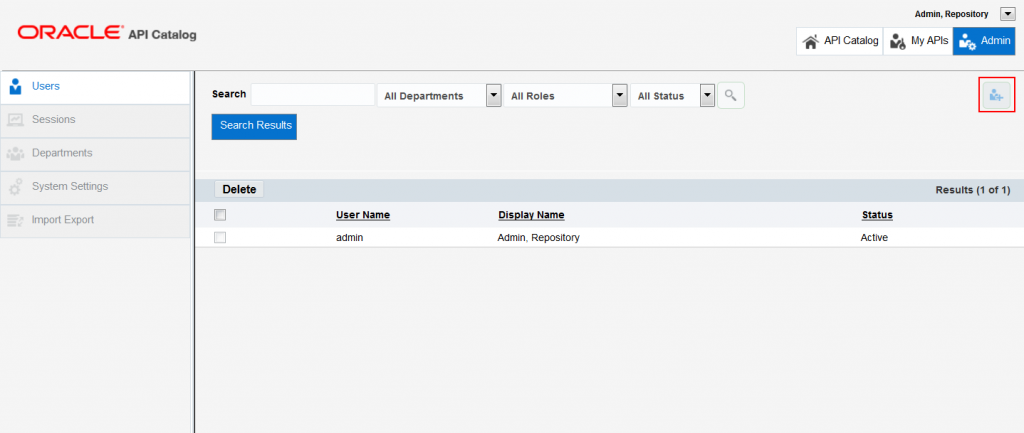
Add, search, edit and delete users
To create a new user click in the Users section on the Add User icon on the top-right of the page section. The Create New User page is displayed. The page is divided into three sub sections; user information, roles and departments. The user information section contains form fields for the username, password, real name and email & phone information. It is also possible to force changing the password and allow the password to never expire. A user can have one of four statuses; Active, Inactive, Lockout (after 3 failed logins) and Unapproved.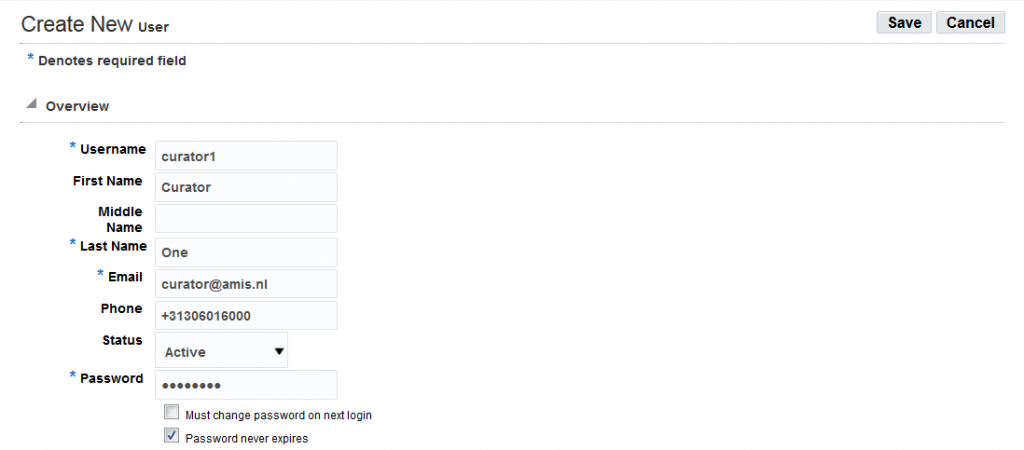


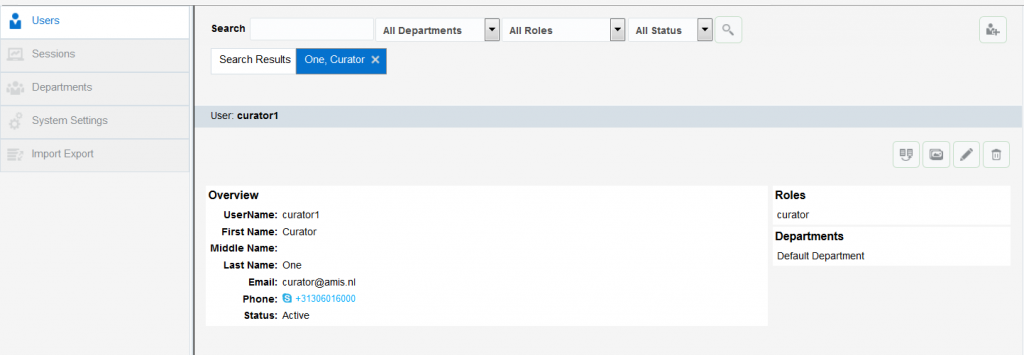

Switching user
To switch to a different user you can sign out of the OAC console by selecting the “Sign Out” options under your user menu. Just click on the arrow on the right side of your name.


Adding an API to My APIs and reviewing the API
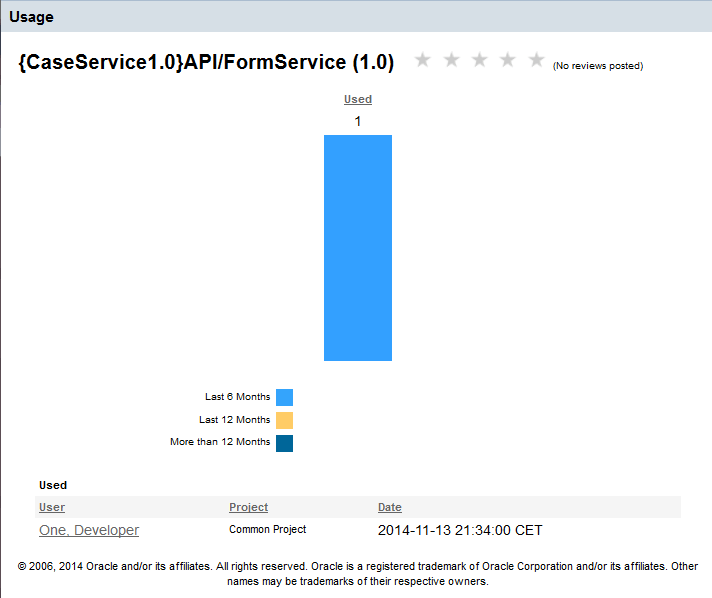
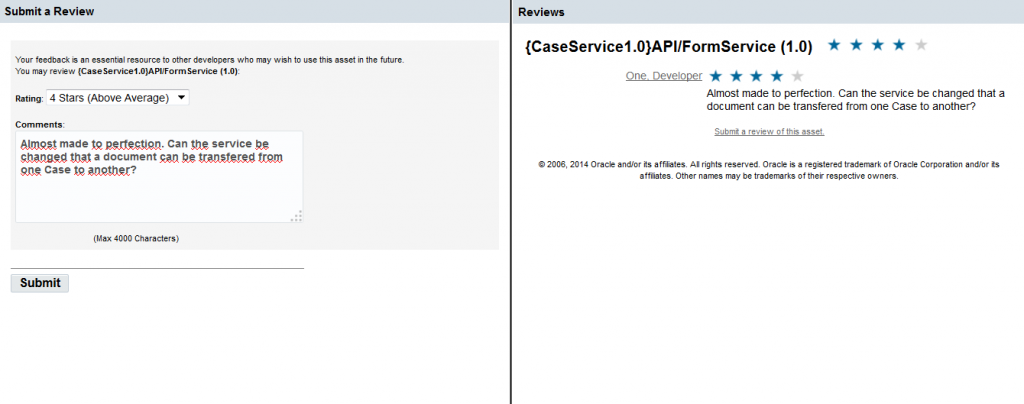
Als user you can add APIs to you favorites (My APIs). To add a API to your favorites go to the API asset details page and add the API to My APIs by clicking the “Add this to My APIs” button. After adding it to My APIs the details page is update and shows how many times it is added (usage) in the past 6 months. Users that have added the API to there My APIs can review on the API asset.


Other administrator tasks
View sessions
The administrator can perform some other tasks that I didn’t discuss yet. On the Sessions section page all (active) sessions are displayed and an administrator can look into the details of the session. An administrator can also delete sessions, which means if a user is active in the console the user will be logged out.

System settings
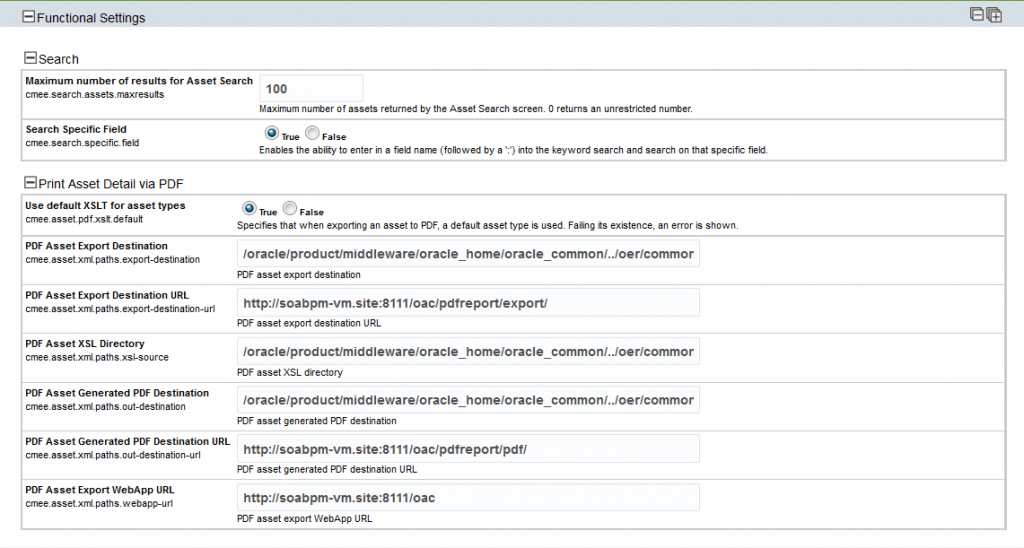
An administrator can change a lot of setting to change the behavior of the OAC console. The system settings page is divided into four main sections; Functional settings, Server Settings, Enterprise Authentication and Import and Export settings (not the actual import/export).The functional settings sections contains settings for search results and printing details via PDF:
The server settings section contains settings for embedding HTML in asset details:

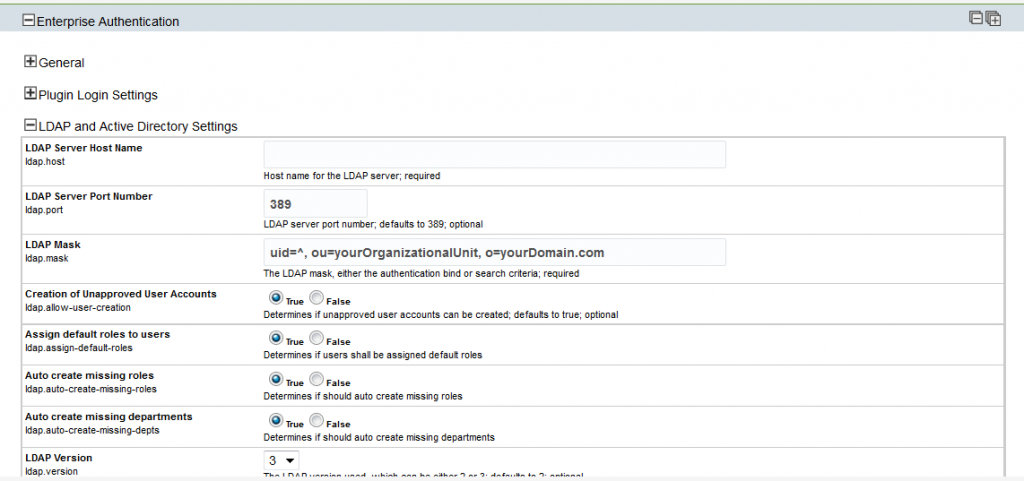
The Enterprise Application section contains settings for connection to a LDAP server for user management:
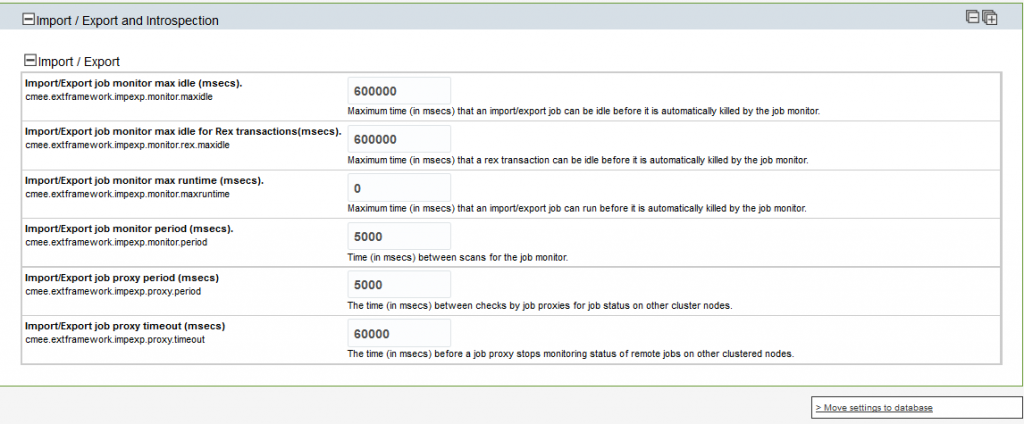
The Import/Export sections contains settings for setting timeouts:
Import / export repository
The import / export of the repository can be done in the corresponding section, but instead of it being done in the web UI it uses java Webstart.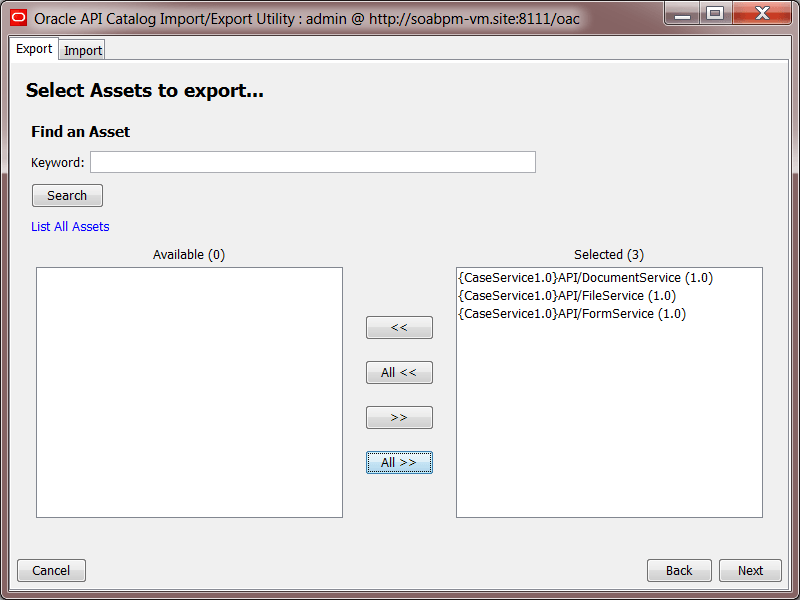
My Verdict
To conclude this blog post I will give my verdict about Oracle API Catalog 12c. In the last week I had some ups but also some downs. I started on my windows laptop and installed everything locally. At first everything seemed fine, I could harvest my first Asset, but after trying to view the details I got a error after another. In the days that followed I was helped by Oracle Development and in special by Mark Dutra, but we couldn’t figure out what the problem was. I think it has something to do with security settings and how the laptop is configured (domain wise).After creating a Linux VM and installed everything again I finally had success and the tables were turned. I really like the interface, it is very clean and uses a common workflow on every page. The use of a separate harvester (command-line or ANT task) is in one way a great solution, because you can use it in your already existing build process, but I missed the option to do this using the OAC console, you don’t always have access to use scripting.
The harvested APIs are added as Draft and an admin or curator can edit the information and publish the API. This version is a great start with lots of information already, like the endpoint, WSDL/WADL summary including methods and message payload. But I miss the possibility to register dependencies between APIs. If API are harvested from one service the separate APIs are not linked to each other.
Adding APIs to your My APIs and the possibility to write a review can be handy. The simple metrics tell you about the usage and who uses it which is already usefull, hopefully in the future more metrics will be available in OAC.
As an administrator you can perform a lot of tasks using the UI. Adding users, looking at active sessions and import/export the repository. It worked fine on Linux, but on windows I had no result. Also the possibility to connect to an LDAP will make it much easier to add users and departments.
Pros:
- Clean and easy UI with common workflow on most pages
- Harvest through command-line (run-time) or ANT (design-time build)
- Possibility to edit Assets and add documentation
- Review on API and give feedback when an API is not working correctly
- Metrics about usage
- A great set of administration tools
- Does not work well with Windows.
- Catalog features are still basic, no dependency viewer
- No online harvester, you can’t harvest via the OAC console

It 's amazing article and useful for developers
ReplyDeleteOracle SOA Online Training
I just want to thank you for sharing your information and your site or blog this is simple but nice Information I’ve ever seen i like it i learn something today. Desentupidora em Atibaia
ReplyDeleteSimply wish to say your article is as astonishing. The clarity in your post is simply great, and I could assume you are an expert on this subject. Same as your blog i found another one Oracle Service-Oriented Architectures .Actually I was looking for the same information on internet for Oracle SOA Suite and came across your blog. I am impressed by the information that you have on this blog. Thanks a million and please keep up the gratifying work.
ReplyDelete